Site Screen
Data is captured on the following tab(s) of the edit screen: Overview, Settings, Notes, Attributes, Resources, Contacts, Documents, Supplier Preferences, Supplier Rates and Geographic Data. Below is a list of descriptions for the fields in the sections on each tab.
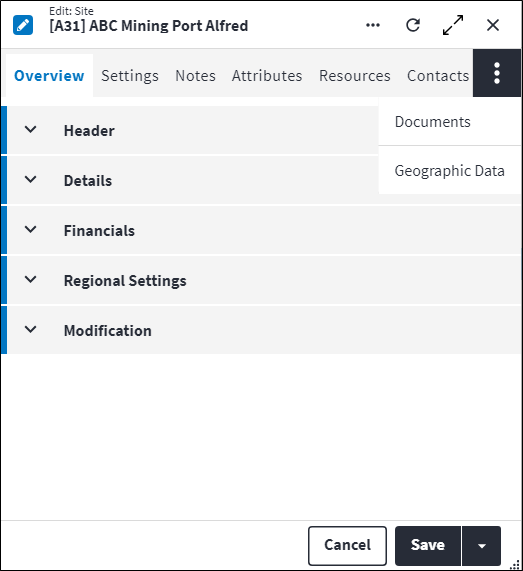
Overview
The Overview tab contains the following section(s):Header
- Code: A unique code that identifies the site, for example
EPPING. - Description: A short description of the site, for example
Epping Jam Factory. - Permission Tree: A field linked to a permission record in a permission tree, that determines whether a user has rights to access records and/or make changes to records. This is assigned by the system where possible.
- Sequence Number: The sequence in which the records are listed. Use the sequence number to list the records in a logical order.
- Is Active: Ticked if the record is active and available in lookup lists.
Details
- Parent Site: The parent value on a record is applicable where a hierarchy is present. The Parent Site Code is an indication of what entity in the hierarchy this child record belongs to. It also provides a means to locate or drill down to the record.
- Site Type: Indicates the type of site, for example
Production. - Is Virtual Site: Select the checkbox if the site is virtual or clear the checkbox if the site is a physical site.
- Enable Requisition Approval Workflow: The requisition workflow approval process is activated or deactivated per site using this Enable Requisition Approval Workflow setting. The default setting (true or false) is specified in the system option Enable Approval Workflow. Possible values are:
System Options(default): The setting specified in system options is used. Refer to Requisitions Defaults Screen for more information.False: Single, header-level requisition approvals by any user with requisition approval rights.True: Approval workflows on requisition or requisition item-level are enabled. Approval workflow expressions will be executed for this site.
Financials
- Currency: The currency used by this site for reporting and costing. This field defaults to the base currency specified for the organisation.
- Financial Year: The current financial year for this site.
- Financial Year Period: The current financial year period for this site.
Regional Settings
- Content Translate: Indicates whether translations should be enabled, ie whether the Content Translations toggle should be switched on. This toggle switch is used to apply content translations globally and is accessed by clicking
 . This will first default to the user setting, then to the user's site setting, then to the system options setting.
 - Date Separator: Define how the values in dates will be separated in On Key Plus. For example, the values can be separated by a slash (/) or a dot (.). This will first default to the user setting, then to the user's site setting, then to the system options setting and is a required field on the system options only. This format will applied throughout the system, excluding the changelog. Possible values are:
NoneSlashDot.
- Date Format: Define the format in which dates will be displayed in On Key Plus. This will first default to the user setting, then to the user's site setting, then to the system options setting and is a required field on the system options only. This format will be applied throughout the system, excluding the changelog.
Possible values are:NoneYYYYMMDDYYYYDDMMDDMMYYYYMMDDYYYY.
- Time Format: Define the format in which time will be displayed in On Key Plus. This will first default to the user setting, then to the user's site setting, then to the system options setting and is a required field on the system options only. This format will be applied throughout the system, excluding the changelog.
Possible values are:NoneClock24hClock12h.
- Time Zone Offset: This is the difference in hours from Coordinated Universal Time (UTC) for a particular location. So, if the site in a location is one hour ahead of UTC, then the Time Zone Offset would be
1. - Default Language: This is the language in which On Key will be displayed when the user logs in. The default language can be set on Users, Sites and System Options, but is only a required field in System Options.
If a default language is set on the user, it takes priority and is applied. If not, the system will check whether the site that's associated with the user has a default language set and apply that.
If the default language is neither specified on the user nor the user's site, then the default language that's set in the System Options is applied.
The default language being applied is illustrated with in the user's account information, which is accessed by clicking then Language.
 - Report Server UI Language: A language and region setting which specifies the language, and how the date and number formats are displayed on Wyn's user interface.
If Report Server UI Language is not specified here, the language will default to the user's site Report Server UI Language, then to the system options setting. The Report Server UI Language value may be null. - Report Server Report Language: A language and region setting which specifies language, and how the date and number formats are displayed in the report in Wyn.
If Report Server Report Language is not specified here, the language will default to the user's site Report Server Report Language, then to the system options setting. The Report Server Report Language value may be null.
Modification
Displays details of when the record was created and last updated. This section is autopopulated and requires no user input.Settings
The Settings tab contains the following section(s):
Default
- Cost Element: The default cost element used for spares that are required at the site.
- Warehouse: The default warehouse used for spares that are required at the site.
Notes
Add additional details, comments or other relevant information.Site Attributes
Attributes are used to describe the specific features, properties or characteristics of entities. An attribute is configured once and then reused across multiple entities.
A linked attribute can be inherited. When items are synced the linked attribute will be inherited, also as a linked attribute. So, if linked to an asset type, for example, then the asset will inherit the linked attribute.
Attributes can be added from the Attributes tab on the entity edit screen or from the entity Attributes dashboard.
The grid displays the attributes that have already been linked. Click ![]() in the toolbar to create a new linked attribute or click
in the toolbar to create a new linked attribute or click ![]() to link an existing attribute.
to link an existing attribute.
The following information is displayed for linked attributes:
- Code: A unique code that identifies the attribute, for example
MODorCOL. - Description: A short description of the attribute, for example
ModelorColour. - Predefined Value: An allowed value for the attribute, which was inserted via the lookup list.
- Value: An allowed value for the attribute, which was entered via free-text.
- Predefined Value Description: A detailed explanation relating to the attribute allowed value.
Attributes added from the entity edit screen are also displayed in a consolidated list of linked attributes on the entity's Attributes dashboard.
Refer to Attributes for more information.
Site Resources
Resources are human resources or special tools which can be applied to perform maintenance tasks on assets. Resources can be classified as staff members, special resources or contacts.
Resources are allocated trades to determine the types of jobs the resource can be used for. A resource could have multiple trades and for each trade the resource could have a different financial rate. A resource can also have multiple competencies, which are used to determine whether the resource is qualified or skilled to undertake a task.
Resources can be added from the Resources tab on the Site screen or from the Site Resources dashboard.
The grid displays the resources that have already been linked to the site. These resources are preconfigured in the system and can have their own contact information. Click ![]() in the toolbar to create a new linked resource.
in the toolbar to create a new linked resource.
The following information is displayed for a linked resource and relates to the context of the resource at the site:
- Resource Code: A unique code that identifies the resource. This could be an HR system code, a surname, or a first name and first letter of a surname. For example
212004,KOOPMANBorTONYW. - Resource Context Code: A unique code that identifies the context of the resource.
- Resource Context Description: A short description of the resource context.
Resources added from the Site screen are also displayed on the Site Resources dashboard.
Refer to Resources for more information.
Site Contacts
The Contacts tab displays the contact information that is associated with the site. You can have multiple contacts on a site. It contains the following section(s):
Phone Numbers
Phone numbers are configured and grouped by phone number type, for example office number, mobile number or fax number. Multiple phone numbers can be added.
The following information is displayed when phone numbers are added:
- Phone Number Type: This identifies the type of phone number.
- Phone Number: The telephone number. The phone number can contain numbers and spaces and has to be at least four characters long.
- Sequence Number: The sequence in which the records are listed. Use the sequence number to list the records in a logical order.
- Notes: Add additional details, comments or other relevant information.
Addresses
Addresses are configured and grouped by address type, for example physical address or postal address. Multiple addresses can be added.
The following information is displayed when addresses are added:
- Address Type: This identifies the type of address.
- Body: The physical address.
- Sequence Number: The sequence in which the records are listed. Use the sequence number to list the records in a logical order.
- Notes: Add additional details, comments or other relevant information.
Emails
Email addresses are configured and grouped by email type, for example business email address or personal email address. Multiple email addresses can be added.
- Email Type: The email type.
- Email: The email address.
- Sequence Number: The sequence in which the records are listed. Use the sequence number to list the records in a logical order.
- Notes: Add additional details, comments or other relevant information.
Site Documents
The purpose of the document linking functionality is to link a document record that has been added to the On Key document library to one or many entities. An example of this could be an instruction manual of how to repair an asset type. This instruction manual can be created as a document record and then linked to a specific asset type. Upon syncing, the instruction manual will be inherited to the child assets, asset components and asset component placeholders when set and linked.
Information regarding linked documents, including the file location, file name, file size and file type, is displayed. For work order documents and work order task documents, Is Copied Document Link also indicates whether the document link was copied from the relevant regular asset type task or regular asset task.
Refer to Document Linking for more information.
Site Supplier Preferences
The site supplier preference refers to the preference or priority given to specific suppliers to deliver a service or provide materials or goods at a specific site. This can be based on factors including reliability, cost-effectiveness, past performance, compliance or contractual agreements.
Supplier preferences can be added from the Supplier Preferences tab on the Site screen or from the Site Supplier Preferences dashboard.
The grid displays the supplier preferences that have already been linked to the site. Click ![]() in the toolbar to create a new linked supplier preference.
in the toolbar to create a new linked supplier preference.
The following information is displayed for linked supplier preferences:
- Supplier Code: A unique code that identifies the supplier, for example
MBP. - Supplier Description: A description of the supplier, for example
Mike Bearing Pty. - Supplier Preference: A number indicating the supplier preference. The number can be negative and zero.
- Sequence Number: The sequence in which the records are listed. Use the sequence number to list the records in a logical order.
Supplier preferences added from the Site screen are also displayed on the Site Supplier Preferences dashboard.
Site Supplier Rates
Supplier rates refer to the costs charged by an external supplier or contractor for providing goods or services related to an asset. This rate is agreed in a contract, service level agreement or purchase order and defines how much a specific service costs (per hour, per unit or per job).A supplier rate is configured for each service a contractor provides.
Supplier rates differ from service rates; the supplier rate is the actual rate charged by the supplier for providing the service, while the service rate is the generic cost provision used by the asset manager for cost allocation, recovery and benchmarking before the service is linked to a specific supplier.
Different sites have different requirements based on a variety of factors, which could include complexity, access or volume of work. Travel, logistics or local regulations also affect pricing.
Supplier rates applicable at a specific site or location can be added from the Supplier Rates tab on the site screen or from the site supplier rates dashboard.
The grid displays the supplier rates that have already been linked to the site. Click ![]() in the toolbar to create a new linked supplier rate.
in the toolbar to create a new linked supplier rate.
The following information is displayed for linked supplier rates:
- Code: A unique code that identifies the supplier, for example
MBP. - Description: A description of the supplier, for example
Mike Bearing Pty. - Supplier Rate: The current active rate applicable for the service provided.
- Site Supplier Rate: The current active rate specific to the site.
- Currency Code: The currency applicable to the rate.
- Unit of Measurement Code: The unit of measurement applicable to the rate.
Supplier rates added from the site screen are also displayed on the site supplier rates dashboard.
Site Supplier Rate Values
The values detail tab contains a record of the rate history for each rate, including the current rate, the old rate and the future rate if applicable. This helps to visualise the rate changes that occur, when these changes take effect and how rate versions evolve.
Values can be added from the Values tab on the site supplier rate screen or from the site supplier rate values dashboard.
The grid displays the values that have already been linked to the site supplier rate. Click ![]() in the toolbar to create a new linked value.
in the toolbar to create a new linked value.
The following information is displayed for linked values:
- Rate Value Type: A classification of the rate value. Selectable values are:
Current: The active rate today. Upon the save action of the site supplier rate record, a site supplier rate value record with Rate Value Type valueCurrentis created. This is system-generated and not selectable by a user.Future: An upcoming rate that is not yet active.Historical: An expired rate that is no longer active.
- Valid From and Valid To: Defines the valid date range of the Rate value. Valid From date and time needs to be before Valid To date and time if both are specified.
- Rate: The rate applicable for the service performed.
Values added from the site supplier rate screen are also displayed on the site supplier rate values dashboard.
Refer to Services for more information.
Site Geographic Data
The geographic data tab displays the entity's saved geographic location. The following geographic location types are supported:
- Point: A single marker on the map.
- Line: Multiple markers on the map connected by a straight line to form a line. Also known as a polyline.
- Area: Multiple markers on the map connected by a straight line to form a polygon.
From the geographic data tab, the map can be viewed and interacted with using the following actions:
- Click: Click on the map to select a location.
- Drag panning: Click and hold down the mouse button while moving the cursor to drag the map.
- Double-click zoom: Rapidly click the left mouse button twice in succession to zoom in on a specific area of the map. If a marker that represents an entity is double-clicked, the record is opened.
- Scroll wheel zoom: Use the mouse scroll wheel (or track pad gestures) to zoom in and out of the map.
- Pinch zoom on mobile: Place two fingers on the screen and either move them apart to zoom out on the map or bring them closer together to zoom in.
- Zoom to area: Hold down the Shift key while dragging a selection box around a specific area of content. Upon release the view zooms in to focus on the selected area.
A new location can be added by selecting the relevant location type from the toolbar (point ![]() , line
, line ![]() or area
or area ![]() ). Once added, the new location can be saved to the entity record.
). Once added, the new location can be saved to the entity record.
Alternatively, the GPS latitude and longitude coordinates can be entered into the coordinates input field (for example -29.6820874442994, 23.8956069946289). Once the add action (![]() ) is selected, the location is indicated on the map with a marker.
) is selected, the location is indicated on the map with a marker.
The following geographic details are available for records with saved locations:
- Reference Entity Type: The type of reference entity, for example
Regular AssetorWork Order. - Reference Entity: The specific reference entity record, for example the specific regular asset.
- Unit of Measurement: The unit of measurement that is used to indicate the location, for example
km. - Start Position: The start offset from the reference entity, for example
45. - End Position: The end offset from the reference entity, for example
50. - Length: The length of the marker in the specified Unit of Measurement, for example
5. - Notes: Add additional details, comments or other relevant information.
Assist custom actions
The following custom actions are available in the Assist panel in the sidebar. Keep in mind that some of these custom actions are only available from the edit screen, while others are available from both the dashboard and edit screen.- Set Active / Set Inactive: Refer to Set Items to Active or Inactive.
- Change Permission Tree: Refer to Change Permission Tree.
- Add to Compare: Refer to Add Items for Comparison.
- Match Update: Refer to Perform Match Update.
- Cross References: Refer to Perform Cross Reference.
- View Changelog: Refer to View Changelog.