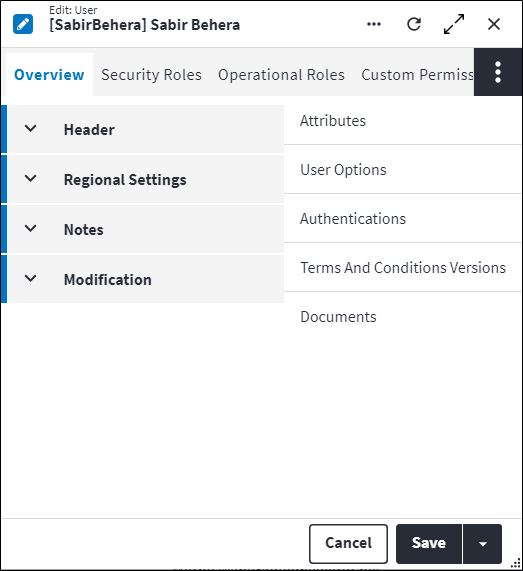
User Screen
Data is captured on the following tab(s) of the edit screen: Overview, Security Roles, Operational Roles, Custom Permissions, Attributes, User Options, Authentications, Terms and Conditions Versions and Documents. Below is a list of descriptions for the fields in the sections on each tab.
Overview
The Overview tab contains the following section(s):Header
- Code: A unique code that identifies the user when he/she logs into the system.
- Full Name: A unique full name that identifies the user, which includes the user's first name and last name, for example
Tom Smith. - Primary Email: The user's primary email address.
- Permission Tree: A field linked to a permission record in a permission tree, that determines whether a user has rights to access records and/or make changes to records. This is assigned by the system where possible.
- Is Administrator: If set to true, the user will have permissions to the entire system. As a result, the Security Roles and Custom Permissions tabs will not be displayed. If set to false, the administrator must allocate permissions for what the user can and cannot do in On Key. This is enabled or disabled by using the Make Administrator or Clear Administrator custom actions in the Assist panel in the sidebar.
- Site: The default site for this user. This is a physical site that the user is associated with.
- Associated Staff Member: The staff member associated with this user.
Practical example of the application of this field using the query builder: - Associated Supplier: The supplier associated with this user. A section can be linked to a supplier, enabling the filtering on user supplier work orders.
Practical example of the application of this field using the query builder: - Operational Role Rule: This governs what profiles a user has access to. Possible values are:
Limited: The user will only be restricted for certain screens. If there's a profile assigned for a screen, then only those profiles can be used for that specific screen. On other screens, the user will have access similar to the "open" rules for system profiles, all public profiles and all operational role profiles. The user can have the permission to create their own profiles or not but will only be able to create profiles for non-restricted screens.Open: The user will have no restrictions and be able to see all groupings.Strict: The user will only be able to see profiles linked to their operational role, therefore they can only view records that have these profiles assigned to them. Even if this user is set up as an administrator (Is Administrator selected), the user cannot create profiles and will not have access to system profiles, other operational role profiles, public profiles (that are not linked to the user's operational roles) or other users' personal profiles. They are not allowed to change the defaults that are assigned to them.
- Is Active: Ticked if the record is active and available in lookup lists.
- Is Authentication Disabled: Indicates whether the user has access to log into On Key Plus or not.
User authentication is set by selecting Enable User Authentication or Disable User Authentication via the Assist panel in the sidebar.
If Is Authentication Disabled is set to true, the system will not be able to authenticate the user and the user will not be able to log into On Key Plus.
If Is Authentication Disabled is set to false, the system will authenticate the user and the user will be able to log into On Key Plus.Is Authentication Disabled validations If Is Authentication Disabled is false, Is Active on the existing active user authentication will stay true. Any authentications that set Is Active to false prior to a change in the status of Is Authentication Disabled, will stay unchanged. If Is Authentication Disabled is true, the current user: - Can update the existing authentications.
- Cannot make Is Active true.
- Cannot create new authentications.
- Cannot delete authentications.
| Requirement | Dashboard | Query builder filter criteria |
|---|---|---|
| Display all the work orders assigned to my Staff Member | Work order | WorkOrder->StaffMember_*Id.User.AssociatedStaffMember_Id = my_id() |
| Requirement | Dashboard | Query builder filter criteria |
|---|---|---|
| Display all the work orders assigned to my Supplier | Work order | WorkOrder->Section_Supplier_*Id.User.AssociatedSupplier_Id = my_id() |
- Content Translate: Indicates whether translations should be enabled, ie whether the Content Translations toggle should be switched on. This toggle switch is used to apply content translations globally and is accessed by clicking
 . This will first default to the user setting, then to the user's site setting, then to the system options setting.
 - Date Separator: Define how the values in dates will be separated in On Key Plus. For example, the values can be separated by a slash (/) or a dot (.). This will first default to the user setting, then to the user's site setting, then to the system options setting and is a required field on the system options only. This format will applied throughout the system, excluding the changelog. Possible values are:
NoneSlashDot.
- Date Format: Define the format in which dates will be displayed in On Key Plus. This will first default to the user setting, then to the user's site setting, then to the system options setting and is a required field on the system options only. This format will be applied throughout the system, excluding the changelog.
Possible values are:NoneYYYYMMDDYYYYDDMMDDMMYYYYMMDDYYYY.
- Time Format: Define the format in which time will be displayed in On Key Plus. This will first default to the user setting, then to the user's site setting, then to the system options setting and is a required field on the system options only. This format will be applied throughout the system, excluding the changelog.
Possible values are:NoneClock24hClock12h.
- Default Language: This is the language in which On Key will be displayed when the user logs in. The default language can be set on Users, Sites and System Options, but is only a required field in System Options.
If a default language is set on the user, it takes priority and is applied. If not, the system will check whether the site that's associated with the user has a default language set and apply that.
If the default language is neither specified on the user nor the user's site, then the default language that's set in the System Options is applied.
The default language being applied is illustrated with in the user's account information, which is accessed by clicking then Language.
Notes
Add additional details, comments or other relevant information.Modification
Displays details of when the record was created and last updated. This section is autopopulated and requires no user input.User Security Roles
User security roles are the security roles that are assigned to a specific user. User security roles govern which system functions the user has access rights to and what the user can and cannot do in On Key.
If the user is not an administrator, ie Is Administrator is disabled, then security roles must be assigned to the user. Furthermore, if the allocated security role is a permission tree role, ie Is Permission Tree Role is enabled, then the specific permission tree that applies must be defined. You can also specify whether or not to apply down the permission tree from that point on, using the Apply Down Permission Tree toggle switch. This indicates that the permissions will apply to records with that permission tree and down (optional).
The user inherits permissions from each security role that is assigned to the user. Additionally, user-specific permissions are configured directly on the user as custom permissions. If any changes have been made to the permissions on the user, these changes will reflect upon using the Calculate Permissions custom action in the Assist panel in the sidebar. Refer to Calculate Permissions for Users for more information.
The following information is displayed when security roles are linked to a user:
- Security Role Code: A unique code that identifies the security role.
- Security Role Description: A description of the security role.
- Valid From: This, together with the Valid To value, is used to set temporary validity or an expiry date for permissions. For example, a validity period can be set for a seasonal artisan that only needs to perform work during a certain period. Specify the date and time from which the permissions on the user security role is valid. If no Valid From and Valid To values are defined, then the user security role is still active.
- Valid To: The date and time that the validity of the user security role is reached. When the user security role is outside of validity, the associated permissions will fall away. If no Valid From and Valid To values are defined, then the user security role is still active.
Refer to Security Roles for more information.
User Operational Roles
User operational roles are the operational roles that are assigned to a specific user. User operational roles govern what profiles the user will default to, what profiles the user can use and what the user can see in On Key.
A user can have multiple operational roles but only one of these can be identified as the default operational role at a time. The user inherits profiles and data resources from each operational role that is linked.
The following information is displayed when operational roles are linked to a user:
- Operational Role Code: A unique code that identifies the operational role.
- Operational Role Description: A description for the operational role.
- User Description: The user's full name.
- Is Default: Indicates whether this is the default operational role for the user. Only one default operational role is allowed per user.
- Is Active: Ticked if the record is active and available in lookup lists.
Refer to Operational Roles for more information.
User Custom Permissions
Custom permissions are additional permissions that are assigned to users in special cases. Custom permissions are configured directly on the user, since they relate to the specific user. They are not applicable to the security role and are therefore not linked to the security role.
Custom permissions are used when the configuration of a specialised security role that is only assigned to a few users is not justified.
The following information is displayed when custom permissions are linked to a user:
- Category: Represents a main menu option in the main menu tree, for example
Work ManagementorResource Management. - Subcategory: Represents a sub-menu option, for example
Task Configuration. - Permission: The action that can be initiated by a user, for example
EditorLookup. - Entity Name: An item in On Key that is associated with a menu option, for example
AssetorStock Item.
User Attributes
Attributes are used to describe the specific features, properties or characteristics of entities. An attribute is configured once and then reused across multiple entities.
A linked attribute can be inherited. When items are synced the linked attribute will be inherited, also as a linked attribute. So, if linked to an asset type, for example, then the asset will inherit the linked attribute.
Click ![]() in the toolbar to create a new linked attribute or click
in the toolbar to create a new linked attribute or click ![]() to link an existing attribute. Once linked, the attribute and its associated details is listed in the grid on the entity's Attributes tab. The following information is displayed:
to link an existing attribute. Once linked, the attribute and its associated details is listed in the grid on the entity's Attributes tab. The following information is displayed:
- Code: A unique code that identifies the attribute, for example
MODorCOL. - Description: ovA short description of the attribute, for example
ModelorColour. - Predefined Value: An allowed value for the attribute, which was inserted via the lookup list.
- Value: An allowed value for the attribute, which was entered via free-text.
- Predefined Value Description: A detailed explanation relating to the attribute allowed value.
The linked attribute also displays in a consolidated list of linked attributes on the entity's Attributes dashboard.
Refer to Attributes for more information.
User Options
User options enable you to configure global settings that apply to various functions in On Key.
When any of the user options fields are inserted and the user creates a work order, the corresponding fields on a work order will be autopopulated with the logged in user's default values. The same applies when the user manually creates a follow up work order. So, the user does not have to enter values on certain work order fields if their defaults have been configured in the user options.
The fields on the user options are defaults for work orders, except for the fields in the Asset Tree and Reports sections. For more information on the defaults for work orders, refer to Work Order Defaults.
Below is a list of descriptions for the fields on the User Options tab. All fields are optional and can be set per user, as needed.
Defaults
- Default Create Save Action: Specifies the user's default save action on all create screens. If the Default Create Save Action configured on the system options screen differs from the selection made here, the User selection takes preference. If None is selected here, the selection made in system options applies. Refer to system options Default Save Action for more information. Possible values are:
None(default)Save and CloseSave and NewSave and Update.
- Default Update Save Action: Specifies the user's default save action on all edit screens. If the Default Update Save Action configured on the system options screen differs from the selection made here, the User selection takes preference. If None is selected here, the selection made in system options applies. Refer to system options Default Save Action for more information. Possible values are:
None(default)SaveSave and Close.
Work Order Planning
- Type of Work: The default type of work that is displayed when this user captures a work order.
- Importance: The default work order importance that is displayed when this user captures a work order.
- Responsible Section: The default section that is displayed when this user captures a work order.
- Responsible Trade: The default trade that is displayed when this user captures a work order.
- Responsible Staff: The default staff member who is responsible for a work order captured by this user.
Work Order Classification
- Work Order Classifications 1-5: The default work order classifications and their allowed values that are displayed when this user captures a work order.
Work Order Status
- Apply Work Order Status Rules: Indicates whether the work order status change rules apply to the user. If set to true, the user has to follow set work order rules when changing the work order status. So, the user can only change the work order status to specific statuses. If set to false, the user can change the work order status to any status.
Costing
- Stock Items Cost Element: The cost element for stock items that is displayed when this user captures a work order.
- Contractors Cost Element: The cost element for contractor services that is displayed when this user captures a work order.
- Direct Purchases Cost Element: The cost element for direct purchases that is displayed when this user captures a work order.
- Work Order Task Resource Cost Element: The cost element for resources that is displayed when this user captures a work order.
Task Planning
- Type of Work: The default type of work for an asset task that is added by this user.
- Importance: The default importance for a task that is added by this user.
- Responsible Section: The default section for a task that is added by this user.
- Responsible Trade: The default trade for a task that is added by this user.
- Responsible Staff: The default staff member for a task that is added by this user.
Task Classifications
- Task Classifications 1-8: The default for each task classification when an asset task is added by this user.
Asset Tree
- Root Asset: This asset is the highest node that appears in the asset tree and only it and its child items can be accessed by this user. If the user's root asset differs from the default root asset specified for the site, then the user's root asset takes preference. If not specified, the user will see all items in the asset tree.
- Is Report User: If ticked, this indicates that this user is a report user. If not ticked, then this user is not a report user.
- Report User ID: Once the record is saved (with Is Report User enabled and the Report User Roles allocated), then the user is created in Wyn's reports portal and the Report User ID will be returned. This field is autopopulated and read-only.
- Report User Name: Once the record is saved (with Is Report User enabled and the Report User Roles allocated), then the user is created in Wyn's reports portal and the Report User Name will be returned. This field is autopopulated and read-only.
- Report User Roles: Allocate Wyn report roles to the user, to determine what the user can and cannot do in Wyn. The roles must be created and exist in Wyn first before they can be allocated in On Key. The Report User Roles are entered manually, as a comma-separated list. If the user is a report user, then they must have at least one role assigned.
- Report Server UI Language: This is a language and region setting, which enables you to configure the language, and how the date and number formats are displayed on Wyn's user interface. This will first default to the user setting, then to the user's site setting, then to the system options setting.
- Report Server Report Language: This is a language and region setting, which enables you to configure the language, and how the date and number formats are displayed in the report in Wyn. This will first default to the user setting, then to the user's site setting, then to the system options setting.
Refer to Wyn Reporting and Language and Regional Settings for Reporting for more information.
Insights
- Insights User: Select the user ID from a list of user IDs for Insights users created for the tenant.
Notes
Add additional details, comments or other relevant information.User Authentications
This is the process On Key uses to verify the identity of its users.
When a user is created in On Key, the Authentications tab will contain no entries. An invite must be sent to onboard the user. On following the link in the invitation e-mail, the user selects the authentication provider that their organisation makes use of from the options displayed. Once the user is authenticated and logged into On Key, the Authentications tab on the user is autopopulated with the authentication provider. For more information on this process, refer to Onboarding and Authentication.
The system uses the user's Primary Email to find the associated Provider Subject key from the authentication provider registry. The Provider Subject is a unique identifier for the user that is associated with the Provider Type. It uses this to authenticate the user.
You can also manually link authentication providers to a user. The Provider Subject, which is obtained from your organisation's IT department, is required when manually linking an authentication provider. A user can have multiple provider types allocated, in which case the relevant authentication provider is selected at login.
The following information is displayed when authentication providers are linked to a user:
- Provider Type: The authentication provider type, such as Azure or Ping, for example.
- Provider Name: The name of the authentication provider.
- Provider Key: A unique identifier for the Provider Type.
Terms and Conditions Versions
The grid shows a list of all the Terms and Conditions that have been applied to the specific user. The details within the grid shows whether the Terms and Conditions are still valid and whether it has been accepted by the user or not.
Only Terms and Conditions that have been published are rolled out and applied to the applicable users. When a set of Terms and Conditions is published, a side effect is to add the specific Terms and Conditions to each user it is applied to.
User Documents
The purpose of the document linking functionality is to link a document record that has been added to the On Key document library to one or many entities. An example of this could be an instruction manual of how to repair an asset type. This instruction manual can be created as a document record and then linked to a specific asset type. Upon syncing, the instruction manual will be inherited to the child assets, asset components and asset component placeholders when set and linked.
Information regarding linked documents, including the file location, file name, file size and file type, is displayed. For work order documents and work order task documents, Is Copied Document Link also indicates whether the document link was copied from the relevant regular asset type task or regular asset task.
Refer to Document Linking for more information.